Account Setup
For this class you will need to create accounts for GitHub and CodeAnywhere.
GitHub
GitHub is a service for storing and sharing code repositories. You will use it to submit your programming assignments. If you already have a GitHub account, you do not need to create a new one specially for this class.
- Go to https://github.com/ and enter your info to “Sign up for GitHub”.
- Choose the free plan
Next:
- Learn how to use Git in the command line and with the GitHub website.
- Possible tutorials:
CodeAnywhere
CodeAnywhere is a web-based Integrated Development Environment (IDE). You will write, compile, and run your code in the CodeAnywhere editor. You must create your GitHub account first!
- Go to https://codeanywhere.com/ and click “Sign Up”
- DO NOT ENTER AN EMAIL AND PASSWORD!
- Scroll down on the Sign Up page and click the GitHub cat icon (3rd from the left)
- Fill in your GitHub account info and grant access to CodeAnywhere
- Check your email and confirm your account.
- If you didn’t get an email, go the CodeAnywhere Dashboard page and have it resend your authorization link.
CodeAnywhere Container Setup
Note: The images below use the name “CS2113” since they were originally written for a different class. You should use the name ‘CS6421’
Here are the basic steps to setup a Container (similar to the virtual machines we talked about in class) on CodeAnywhere. You will then have complete control inside the container to install new software, develop code, etc.
- Go to CodeAnywhere and click the GitHub cat icon to log in.
- Setup a new Connection. If the Connection Wizard doesn’t open automatically, select
File->New Connection->Container - You should see a screen like this:
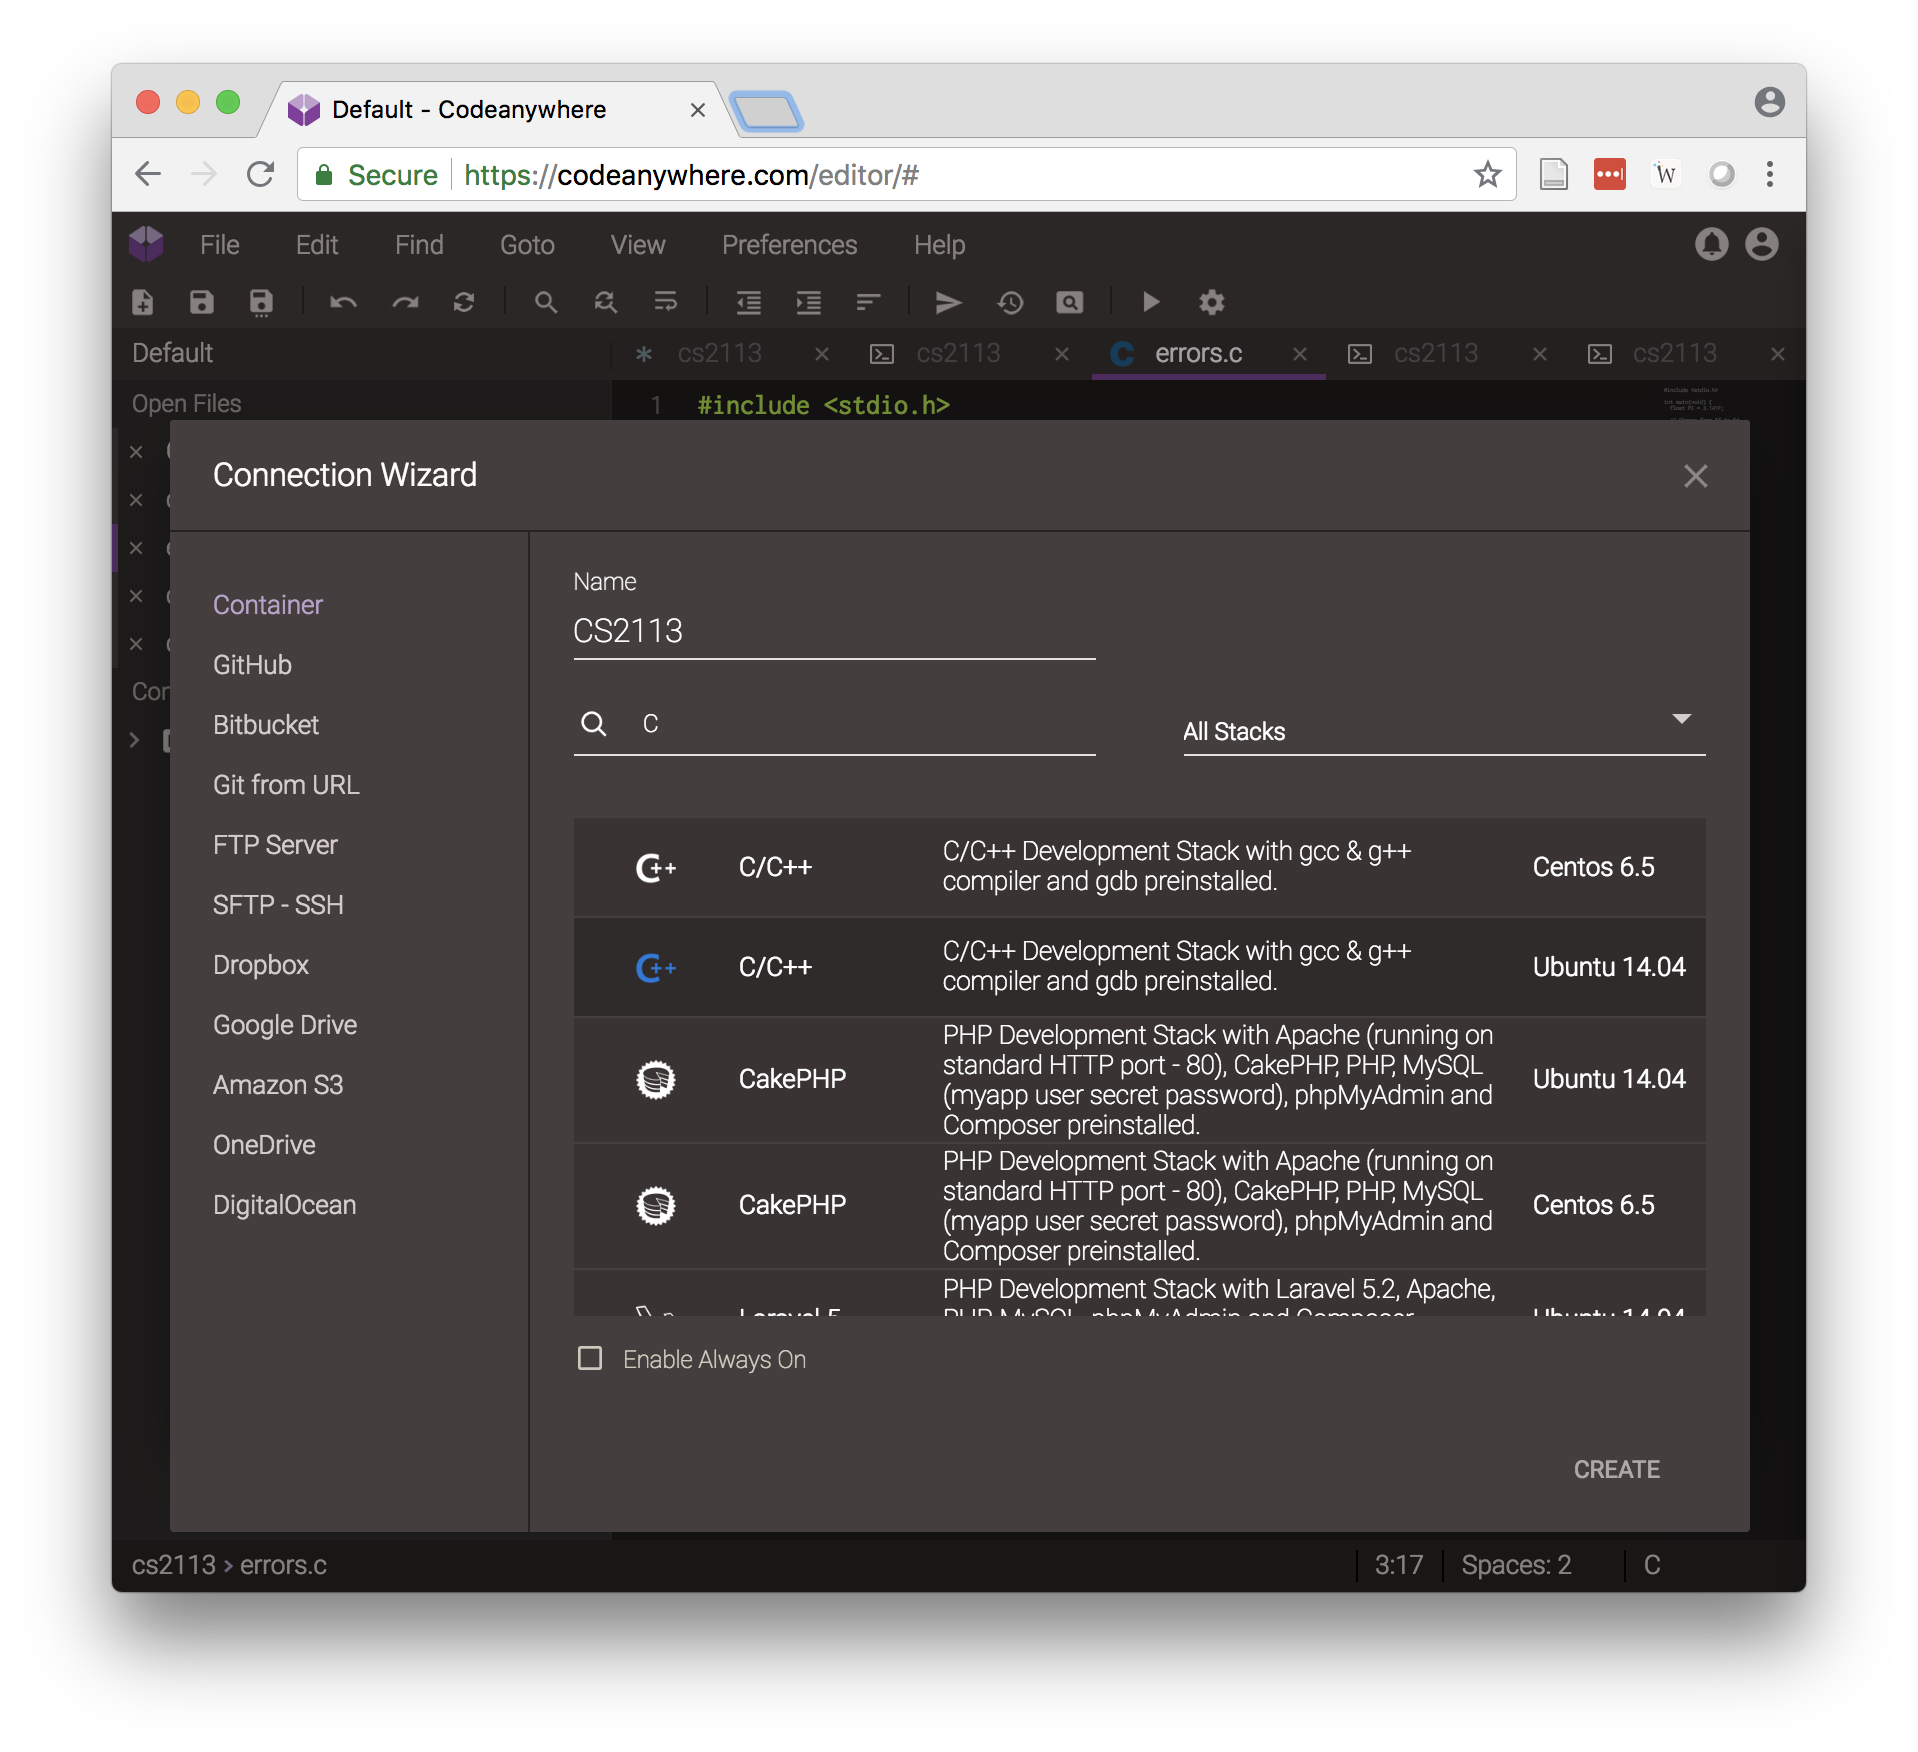
- Use the name
CS6421and typecin the Search Stack box. Select theUbuntu 14.04version of the C/C++ container as shown above. - Click Create Container and wait for the container to be deployed.
- If you are not able to create the container, you may need to confirm your account by clicking the link in your email. If you didn’t get the email (I did not), then go to your Dashboard page and click the button for it to be re-sent.
- Once the container is ready, it will open a page showing some basic information about the computer that you are connected to.
Command Line Basics
- Open a terminal by right clicking on “cs6421” under connections and selecting
SSH Terminalas shown in this screenshot

- This will open a terminal with a Command Line where you can issue commands to your own personal Linux server. It should start with something like:
Last login: Mon Jul 30 13:37:40 2018 from 52.161.27.127
cabox@box-codeanywhere:~/workspace$
This indicates when you last logged onto the server (Mon Jul 30 13:37:40 2018), from what IP address (52.161.27.127), your username (cabox), the host name of the server you are connected to (box-codeanywhere), and the folder that you are currently working inside of (~/workspace).
The CodeAnywhere IDE is powerful because it gives you both a command line and an editor all inside a web browser. Here are a few tips:
- The first thing you should do is install some software by running:
sudo apt-get update sudo apt-get install python telnet openjdk-7-jdk gdb - To see any files you have created from the command line, right click on
CS6421under Connections and chooseRefresh. This will refresh the left part of the window, which is known as the File Hierarchy. - Right click on your container and select
Infoto see some useful information, including the host name of your container. - After a few hours of idleness, your container will automatically shutdown. Try right clicking on its name and telling it to turn on or reboot. Sometimes you need to reload the entire web page for it to show the proper status of the container.
Next:
- Learn the basics of the Linux command line.
- Here is one command line tutorial
- Use google and you will find more